INTRODUCTION:
I am currently enrolled in Udacity’s VR developer course. My first project, named Puzzler VR, was about learning how to create a VR game using Unity for Android devices. I have only utilized the Oculus Rift and Vive headset + Unreal Engine to create VR experiences, so this was new to me and I was ready to jump in!
The goal of the the project was to design a puzzle experience that would allow the user to be able to walk through a space, play a Simon Says like game (choose the correct order of spheres in sequence), and restart the game. Most of the code and models were prepared for the students, which were handy foundations to begin building the game.
PROCESS:
Firstly, the class taught the designer to imagine a user and draw out some options of what they would like to see in her game. I came up with a few ideas here:

I imagined my user as someone who would enjoy puzzle games and who would have a basic understanding of VR apps for mobile app. I also imagined a few alternatives to the “dungeon” environment, including a spooky cabin in the woods and a circus themed puzzle.
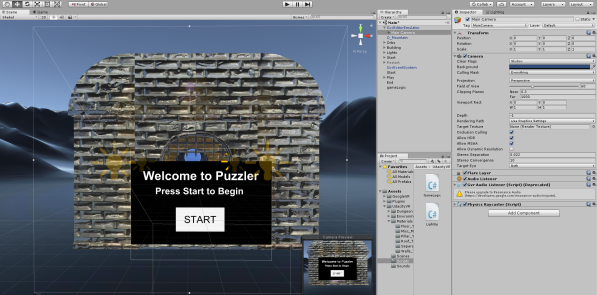
Initially, I found Unity quite easy to use. I was able to build the dungeon environment with the models Udacity provided, even including some mountainous terrain as backdrop. Also included are the beginnings of a user interface to allow the player to start the game, seen in the screengrab below:

Also important were lighting and some assets to give the user a more realistic idea of the their environment:

USER TESTING:
When I uploaded the beginnings of my game (just the dungeon environment I built), I found the scale to be WAY off on my mobile device in comparison to the preview on my PC screen. My boyfriend, who is about 6 inches taller than I am, even felt that the door was way too large. The one aspect he really enjoyed playing the game were the sound effects (added at a later point- I tested to game on him quite frequently!) Here he is testing out the game:

OUTCOMES:
Once I finally got the project to the correct scale (after a few iterations), I could begin implementing the game mechanics.
Firstly, it was important to ensure all user interfaces correctly worked when clicked. This included a start button at the beginning of the game, the Simon Says game play itself, and the restart button. Again, most code was provided for us, however, I was able to learn Unity’s interface through the course when implementing it with my game objects. Here is the setup for my game logic script:

Lastly, the class taught us how to utilize sound in our game to add another aspect to our environment and provide a better user experience. From the image below, you can see that each sphere has audioclips associated with it so that when the user chooses correctly or incorrectly, the sphere will play the sound accordingly.

And that was it! I was ready to test out my game. See the video below for the final run through of my basic Simon Says “Puzzler” game. I purposefully (maybe…) guessed the first sequence incorrectly to show how the game restarts and the spheres let you try again until you succeed and move to the restart user interface.
View the video below for the final gameplay:
CONCLUSION:
Cheers, hope you enjoyed the video! I am excited about moving forward with Unity for not only mobile devices, but for my Oculus rift as well (hopefully keeping the frame-rate within a reasonable amount :D) This first project was extremely helpful in introducing me to Unity and creating a playable VR game on a mobile device.
